
- CONTENTS
- Introduction
- Prerequisites
- Step 1 — Installing Apache and Updating the Firewall
- Step 2 — Installing MariaDB
- Step 3 — Installing PHP
- Step 4 — Creating a Virtual Host for your Website
- Step 5 — Testing PHP Processing on your Web Server
- Step 6 — Testing Database Connection from PHP (Optional)
- Conclusion
// Tutorial //
How To Install Linux, Apache, MariaDB, PHP (LAMP) stack on Debian 10
 stack on Debian 10")
Not using Debian 10?Choose a different version or distribution.
Introduction
A “LAMP” stack is a group of open-source software that is typically installed together to enable a server to host dynamic websites and web apps. This term is actually an acronym which represents the Linux operating system, with the Apache web server. The site data is stored in a MariaDB database, and dynamic content is processed by PHP.
Although this software stack typically includes MySQL as the database management system, some Linux distributions — including Debian — use MariaDB as a drop-in replacement for MySQL.
In this guide, we will install a LAMP stack on a Debian 10 server, using MariaDB as the database management system.
Prerequisites
In order to complete this tutorial, you will need to have a Debian 10 server with a non-root sudo-enabled user account and a basic firewall. This can be configured using our initial server setup guide for Debian 10.
Step 1 — Installing Apache and Updating the Firewall
The Apache web server is among the most popular web servers in the world. It’s well-documented and has been in wide use for much of the history of the web, which makes it a great default choice for hosting a website.
Install Apache using Debian’s package manager, APT:
- sudo apt update
- sudo apt install apache2
Since this is a sudo command, these operations are
executed with root privileges. It will ask you for your regular user’s
password to verify your intentions.
Once you’ve entered your password, apt will tell you which packages it plans to install and how much extra disk space they’ll take up. Press Y and hit ENTER to continue, and the installation will proceed.
Next, assuming that you have followed the initial server setup instructions by installing and enabling the UFW firewall, make sure that your firewall allows HTTP and HTTPS traffic.
When installed on Debian 10, UFW comes loaded with app profiles which you can use to tweak your firewall settings. View the full list of application profiles by running:
- sudo ufw app list
The WWW profiles are used to manage ports used by web servers:
OutputAvailable applications:
. . .
  WWW
  WWW Cache
  WWW Full
  WWW Secure
. . .
If you inspect the WWW Full profile, it shows that it enables traffic to ports 80 and 443:
- sudo ufw app info "WWW Full"
OutputProfile: WWW Full
Title: Web Server (HTTP,HTTPS)
Description: Web Server (HTTP,HTTPS)

Ports:
  80,443/tcp
Allow incoming HTTP and HTTPS traffic for this profile:
- sudo ufw allow in "WWW Full"
You can do a spot check right away to verify that everything went as planned by visiting your server’s public IP address in your web browser:
http://your_server_ip
You will see the default Debian 10 Apache web page, which is there for informational and testing purposes. It should look something like this:
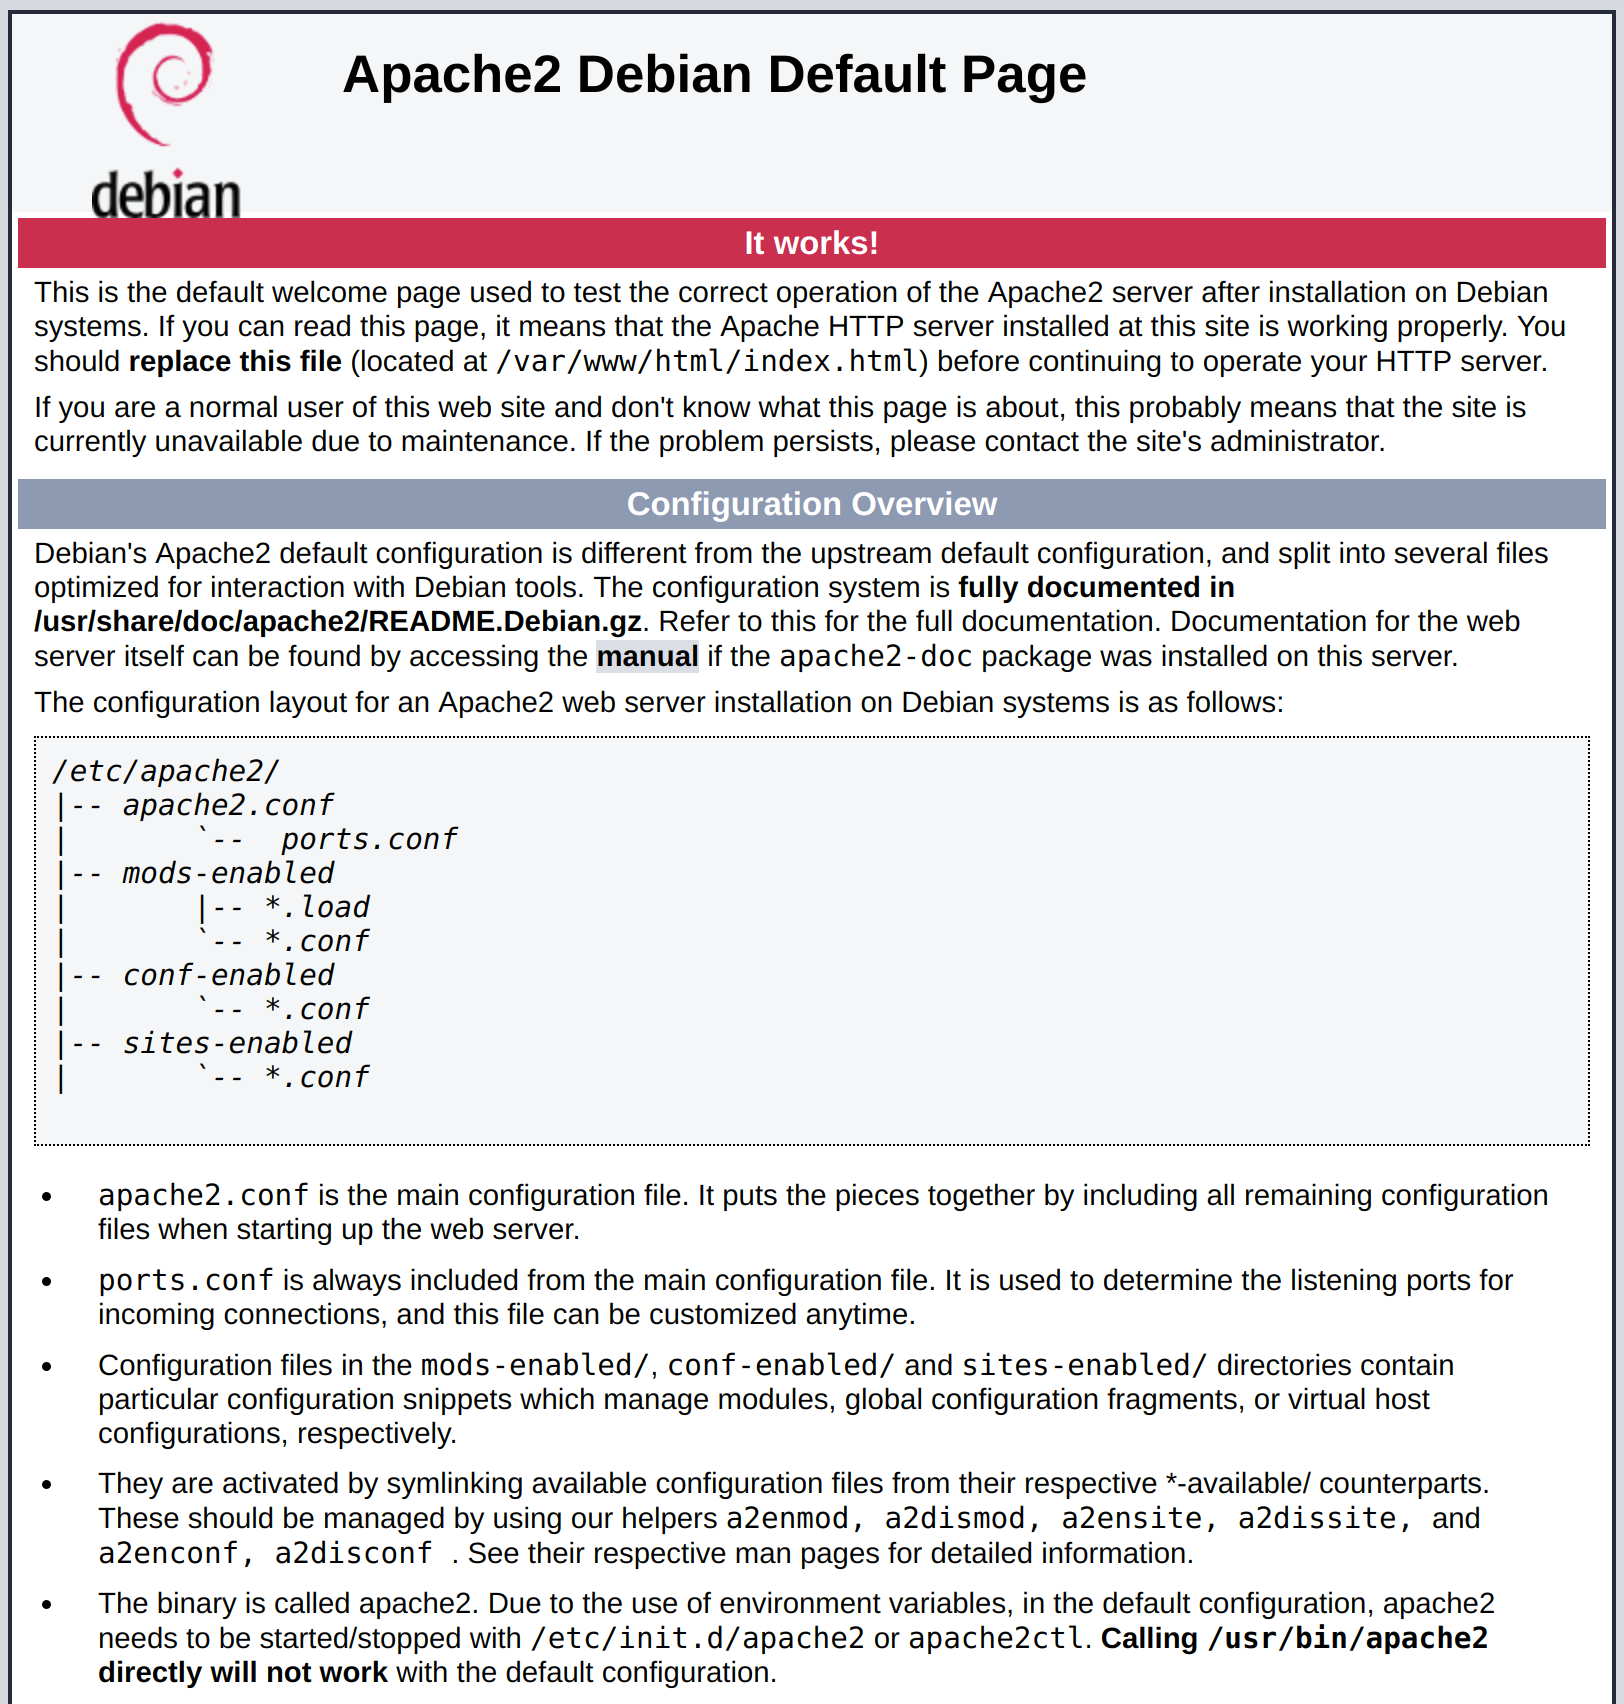
If you see this page, then your web server is now correctly installed and accessible through your firewall.
If you do not know what your server’s public IP address is, there are a number of ways you can find it. Usually, this is the address you use to connect to your server through SSH.
There are a few different ways to do this from the command line. First, you could use the iproute2 tools to get your IP address by typing this:
- ip addr show eth0 | grep inet | awk '{ print $2; }' | sed 's/\/.*$//'
This will give you two or three lines back. They are all correct addresses, but your computer may only be able to use one of them, so feel free to try each one.
An alternative method is to use the curl utility to contact an outside party to tell you how it sees your server. This is done by asking a specific server what your IP address is:
- sudo apt install curl
- curl http://icanhazip.com
Regardless of the method you use to get your IP address, type it into your web browser’s address bar to view the default Apache page.
Step 2 — Installing MariaDB
Now that you have a web server up and running, you need to install the database system to be able to store and manage data for your site.
In Debian 10, the metapackage mysql-server, which was traditionally used to install the MySQL server, was replaced by default-mysql-server. This metapackage references MariaDB,
a community fork of the original MySQL server by Oracle, and it’s
currently the default MySQL-compatible database server available on
debian-based package manager repositories.
For longer term compatibility, however, it’s recommended that instead
of using the metapackage you install MariaDB using the program’s actual
package, mariadb-server.
To install this software, run:
- sudo apt install mariadb-server
When the installation is finished, it’s recommended that you run a security script that comes pre-installed with MariaDB. This script will remove some insecure default settings and lock down access to your database system. Start the interactive script by running:
- sudo mysql_secure_installation
This script will take you through a series of prompts where you can
make some changes to your MariaDB setup. The first prompt will ask you
to enter the current database root password. This is not to be confused with the system root. The database root
user is an administrative user with full privileges over the database
system. Because you just installed MariaDB and haven’t made any
configuration changes yet, this password will be blank, so just press ENTER at the prompt.
The next prompt asks you whether you’d like to set up a database root password. Because MariaDB uses a special authentication method for the root user that is typically safer than using a password, you don’t need to set this now. Type N and then press ENTER.
From there, you can press Y and then ENTER
to accept the defaults for all the subsequent questions. This will
remove anonymous users and the test database, disable remote root login, and load these new rules so that MariaDB immediately respects the changes you have made.
When you’re finished, log in to the MariaDB console by typing:
- sudo mariadb
This will connect to the MariaDB server as the administrative database user root, which is inferred by the use of sudo when running this command. You should see output like this:
OutputWelcome to the MariaDB monitor.  Commands end with ; or \g.
Your MariaDB connection id is 74
Server version: 10.3.15-MariaDB-1 Debian 10

Copyright (c) 2000, 2018, Oracle, MariaDB Corporation Ab and others.

Type 'help;' or '\h' for help. Type '\c' to clear the current input statement.

MariaDB [(none)]>
Notice that you didn’t need to provide a password to connect as the root user. That works because the default authentication method for the administrative MariaDB user is unix_socket instead of password.
Even though this might look like a security concern at first, it makes
the database server more secure because the only users allowed to log in
as the root MariaDB user are the system users with
sudo privileges connecting from the console or through an application
running with the same privileges. In practical terms, that means you
won’t be able to use the administrative database root user to connect from your PHP application.
For increased security, it’s best to have dedicated user accounts with less expansive privileges set up for every database, especially if you plan on having multiple databases hosted on your server. To demonstrate such a setup, we’ll create a database named example_database and a user named example_user, but you can replace these names with different values. To create a new database, run the following command from your MariaDB console:
- CREATE DATABASE example_database;
Now you can create a new user and grant them full privileges on the
custom database you’ve just created. The following command defines this
user’s password as password, but you should replace this value with a secure password of your own choosing.
- GRANT ALL ON example_database.* TO 'example_user'@'localhost' IDENTIFIED BY 'password' WITH GRANT OPTION;
This will give the example_user user full privileges over the example_database database, while preventing this user from creating or modifying other databases on your server.
Flush the privileges to ensure that they are saved and available in the current session:
- FLUSH PRIVILEGES;
Following this, exit the MariaDB shell:
- exit
You can test if the new user has the proper permissions by logging in to the MariaDB console again, this time using the custom user credentials:
- mariadb -u example_user -p
Note the -p flag in this command, which will prompt you for the password used when creating the example_user user. After logging in to the MariaDB console, confirm that you have access to the example_database database:
- SHOW DATABASES;
This will give you the following output:
Output+--------------------+
| Database           |
+--------------------+
| example_database   |
| information_schema |
+--------------------+
2 rows in set (0.000 sec)
To exit the MariaDB shell, type:
- exit
At this point, your database system is set up and you can move on to installing PHP, the final component of the LAMP stack.
Step 3 — Installing PHP
PHP is the component of your setup that will process code to display dynamic content. It can run scripts, connect to your MariaDB databases to get information, and hand the processed content over to your web server to display.
Once again, leverage the apt system to install PHP. In
addition, include some helper packages which will ensure that PHP code
can run under the Apache server and talk to your MariaDB database:
- sudo apt install php libapache2-mod-php php-mysql
This should install PHP without any problems. We’ll test this in a moment.
In most cases, you will want to modify the way that Apache serves
files. Currently, if a user requests a directory from the server, Apache
will first look for a file called index.html. We want to tell the web server to prefer PHP files over others, so make Apache look for an index.php file first.
To do this, type the following command to open the dir.conf file in a text editor with root privileges:
- sudo nano /etc/apache2/mods-enabled/dir.conf
It will look like this:
<IfModule mod_dir.c>
    DirectoryIndex index.html index.cgi index.pl index.php index.xhtml index.htm
</IfModule>
Move the PHP index file (highlighted above) to the first position after the DirectoryIndex specification, like this:
<IfModule mod_dir.c>
    DirectoryIndex index.php index.html index.cgi index.pl index.xhtml index.htm
</IfModule>
When you are finished, save and close the file. If you’re using nano, you can do that by pressing CTRL+X, then Y and ENTER to confirm.
Now reload Apache’s configuration with:
- sudo systemctl reload apache2
You can check on the status of the apache2 service with systemctl status:
- sudo systemctl status apache2
Sample Output● apache2.service - The Apache HTTP Server
   Loaded: loaded (/lib/systemd/system/apache2.service; enabled; vendor preset: enabled)
   Active: active (running) since Mon 2019-07-08 12:58:31 UTC; 8s ago
     Docs: https://httpd.apache.org/docs/2.4/
  Process: 11948 ExecStart=/usr/sbin/apachectl start (code=exited, status=0/SUCCESS)
 Main PID: 11954 (apache2)
    Tasks: 6 (limit: 4719)
   Memory: 11.5M
   CGroup: /system.slice/apache2.service
           ├─11954 /usr/sbin/apache2 -k start
           ├─11955 /usr/sbin/apache2 -k start
           ├─11956 /usr/sbin/apache2 -k start
           ├─11957 /usr/sbin/apache2 -k start
           ├─11958 /usr/sbin/apache2 -k start
           └─11959 /usr/sbin/apache2 -k start
At this point, your LAMP stack is fully operational, but before you can test your setup with a PHP script it’s best to set up a proper Apache Virtual Host to hold your website’s files and folders. We’ll do that in the next step.
Step 4 — Creating a Virtual Host for your Website
By default, Apache serves its content from a directory located at /var/www/html, using the configuration contained in /etc/apache2/sites-available/000-default.conf. Instead of modifying the default website configuration file, we are going to create a new virtual host for testing your PHP environment. Virtual hosts enable us to keep multiple websites hosted on a single Apache server.
Following that, you’ll create a directory structure within /var/www for an example website named your_domain.
Create the root web directory for your_domain as follows:
- sudo mkdir /var/www/your_domain
Next, assign ownership of the directory with the $USER environment variable, which should reference your current system user:
- sudo chown -R $USER:$USER /var/www/your_domain
Then, open a new configuration file in Apache’s sites-available directory using your preferred command-line editor. Here, we’ll use nano:
- sudo nano /etc/apache2/sites-available/your_domain.conf
This will create a new blank file. Paste in the following bare-bones configuration:
<VirtualHost *:80>
    ServerName your_domain
    ServerAlias www.your_domain
    ServerAdmin webmaster@localhost
    DocumentRoot /var/www/your_domain
    ErrorLog ${APACHE_LOG_DIR}/error.log
    CustomLog ${APACHE_LOG_DIR}/access.log combined
</VirtualHost>
With this VirtualHost configuration, we’re telling Apache to serve your_domain using /var/www/your_domain as the web root directory. If you’d like to test Apache without a domain name, you can remove or comment out the options ServerName and ServerAlias by adding a # character in the beginning of each option’s lines.
You can now use a2ensite to enable this virtual host:
- sudo a2ensite your_domain
You might want to disable the default website that comes installed with Apache. This is required if you’re not using a custom domain name, because in this case Apache’s default configuration would overwrite your Virtual Host. To disable Apache’s default website, type:
- sudo a2dissite 000-default
To make sure your configuration file doesn’t contain syntax errors, you can run:
- sudo apache2ctl configtest
Finally, reload Apache so these changes take effect:
- sudo systemctl reload apache2
Your new website is now active, but the web root /var/www/your_domain
is still empty. In the next step, we’ll create a PHP script to test the
new setup and confirm that PHP is correctly installed and configured on
your server.
Step 5 — Testing PHP Processing on your Web Server
Now that you have a custom location to host your website’s files and folders, we’ll create a simple PHP test script to confirm that Apache is able to handle and process requests for PHP files.
Create a new file named info.php inside your custom web root folder:
- nano /var/www/your_domain/info.php
This will open a blank file. Add the following text, which is valid PHP code, inside the file:
<?php
phpinfo();
When you are finished, save and close the file.
Now you can test whether your web server is able to correctly display content generated by this PHP script. To try this out, visit this page in your web browser. You’ll need your server’s public IP address again.
The address you will want to visit is:
http://your_domain/info.php
You should see a page similar to this:

This page provides some basic information about your server from the perspective of PHP. It is useful for debugging and to ensure that your settings are being applied correctly.
If you can see this page in your browser, then your PHP installation is working as expected.
After checking the relevant information about your PHP server through
that page, it’s best to remove the file you created as it contains
sensitive information about your PHP environment and your Debian server.
You can use rm to do so:
- sudo rm /var/www/your_domain/info.php
You can always recreate this page if you need to access the information again later.
Step 6 — Testing Database Connection from PHP (Optional)
If you want to test whether PHP is able to connect to MariaDB and execute database queries, you can create a test table with dummy data and query for its contents from a PHP script.
First, connect to the MariaDB console with the database user you created in Step 2 of this guide:
- mariadb -u example_user -p
Create a table named todo_list. From the MariaDB console, run the following statement:
- CREATE TABLE example_database.todo_list (
- item_id INT AUTO_INCREMENT,
- content VARCHAR(255),
- PRIMARY KEY(item_id)
- );
Now, insert a few rows of content in the test table. You might want to repeat the next command a few times, using different values:
- INSERT INTO example_database.todo_list (content) VALUES ("My first important item");
To confirm that the data was successfully saved to your table, run:
- SELECT * FROM example_database.todo_list;
You will see the following output:
Output+---------+--------------------------+
| item_id | content                  |
+---------+--------------------------+
|       1 | My first important item  |
|       2 | My second important item |
|       3 | My third important item  |
|       4 | and this one more thing  |
+---------+--------------------------+
4 rows in set (0.000 sec)
After confirming that you have valid data in your test table, you can exit the MariaDB console:
- exit
Now you can create the PHP script that will connect to MariaDB and
query for your content. Create a new PHP file in your custom web root
directory using your preferred editor. We’ll use nano for that:
- nano /var/www/your_domain/todo_list.php
The following PHP script connects to the MariaDB database and queries for the content of the todo_list table, exhibiting the results in a list. If there’s a problem with the database connection, it will throw an exception.
Copy this content into your todo_list.php script:
<?php
$user = "example_user";
$password = "password";
$database = "example_database";
$table = "todo_list";

try {
  $db = new PDO("mysql:host=localhost;dbname=$database", $user, $password);
  echo "<h2>TODO</h2><ol>";
  foreach($db->query("SELECT content FROM $table") as $row) {
    echo "<li>" . $row['content'] . "</li>";
  }
  echo "</ol>";
} catch (PDOException $e) {
    print "Error!: " . $e->getMessage() . "<br/>";
    die();
}
Save and close the file when you’re done editing.
You can now access this page in your web browser by visiting the domain name or public IP address for your website, followed by /todo_list.php:
http://your_domain/todo_list.php
You should see a page like this, showing the content you’ve inserted in your test table:

That means your PHP environment is ready to connect and interact with your MariaDB server.
Conclusion
In this guide, we’ve built a flexible foundation for serving PHP websites and applications to your visitors, using Apache as web server and MariaDB as database system.
To further improve your current setup, you can install Composer for dependency and package management in PHP, and you can also install an OpenSSL certificate for your website using Let’s Encrypt.
Want to learn more? Join the DigitalOcean Community!
Join our DigitalOcean community of over a million developers for free! Get help and share knowledge in our Questions & Answers section, find tutorials and tools that will help you grow as a developer and scale your project or business, and subscribe to topics of interest.
Sign upauthor
Technical Writer @ DigitalOcean
author
Dev/Ops passionate about open source, PHP, and Linux.

I created locally site and example database using this tutorial. It worked when accessing database by opening /localhost/todo_list.php(in my case table1.php), but after reboot I’m getting this:
What am I missing?
The problem repeated. But after I disabled ufw and rebooted system(Debian 10, 64 bit) apache server worked again. So any ideas how to configure ufw properly?
I figured out that it is not depends from ufw, because without ufw Apache sometimes works and sometimes not. I cannot get what is the problem. The start page of Apache server is loaded correctly but sudo systemctl status apache2.service command shows that server failed to start, and mariadb base is not loading by browser…
I am working thru this tutorial, but have run into a problem with the php installation.
When I run:
I get the following response:
Any suggestions?
On the todo list test page, it just says “TODO” without displaying anything from the database.
hello there i use those insructions but you forget to change in host file
sudo nano hosts **** ADD THIS LINE *** 127.0.0.1 your_domain